How to Create a Windows 11 Recovery Drive
Create a bootable Windows 11 Recovery Drive on USB so you can access recovery tools and reinstall Windows if the PC cannot start.
- Applies to Windows 11
- 3 min read
View article illustration
A Windows 11 Recovery Drive gives you bootable USB recovery media for the PC it was created on. If Windows will not start—or even if you replace the internal drive—the recovery USB can provide recovery tools and, when system files were included, a way to restore Windows.
It is worth creating while the computer is healthy, not after the drive has already failed.
What you need
Use an empty USB flash drive. The Recovery Drive wizard tells you how much capacity it requires for that PC.
Everything already on the selected USB drive will be erased. Move any important files off it before continuing.
Create the recovery drive
- Connect the USB flash drive.
- Open Start and search for Recovery Drive.
- Open Create a recovery drive and approve the administrator prompt.
- Keep Back up system files to the recovery drive selected if you want the USB to support reinstall/recovery using the Windows system files.
- Select Next.
- Choose the correct USB drive carefully.
- Select Next > Create.
The process can take a while because Windows may copy recovery tools, current Windows files, updates, and manufacturer customizations needed for that device.
A Recovery Drive does not back up personal files
This is the most important limitation. The Recovery Drive is designed to recover Windows—not your Documents, photos, projects, browser downloads, or other personal data.
Use Windows Backup, File History, OneDrive, another cloud service, or a separate backup system for personal files.
How to use the recovery USB
If Windows cannot start, connect the Recovery Drive, use the manufacturer’s boot menu to start from USB, choose the keyboard layout if prompted, and open the available recovery options.
Depending on the recovery environment and how the drive was created, you may be able to access troubleshooting tools or recover Windows from the drive.
Keep your BitLocker recovery key available
If Device Encryption or BitLocker is enabled, Windows Recovery Environment may ask for the 48-digit BitLocker recovery key before allowing access to some repair or recovery operations.
Store that key somewhere you can reach without relying on the locked PC.
Should you create one Recovery Drive for every PC?
Yes. Microsoft describes Recovery Drive media as being created for and used on the device it belongs to. Different PCs can have different drivers, recovery partitions, architecture, and OEM customizations.
Test that the USB is actually bootable
After creating the drive, it is worth confirming that your PC can see it in the firmware boot menu. You do not need to start a recovery operation—simply verify that the USB can load the recovery environment, then exit without making changes.
This check is especially useful on systems with unusual USB boot settings or after changing Secure Boot or firmware configuration.
Recreate it after major changes
A Recovery Drive is not continuously updated while it sits in a drawer. After a major Windows version upgrade or significant recovery/firmware change, creating fresh media is a sensible maintenance step.
Label the USB with the PC name and creation date so you know exactly which machine it belongs to when you actually need it.
Official references
Microsoft Support — Backup, restore, and Recovery Drive in WindowsOfficial reference Microsoft Support — Recovery options in WindowsOfficial referenceRelated posts
Browse all articles →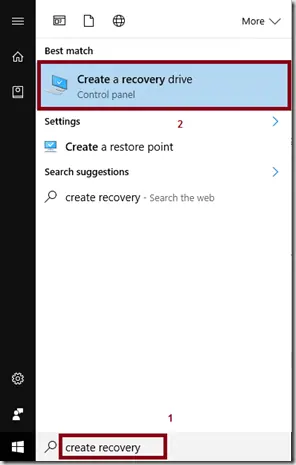
How to Create a Windows 10 Recovery USB
Create a Windows 10 recovery drive on an empty USB device and understand what the recovery drive does and does not back up.
How to Use Point-in-Time Restore in Windows 11
Point-in-Time Restore can roll Windows 11 back to a recent full-system snapshot, including apps, settings, and personal files.
How to Enable and Use Quick Machine Recovery in Windows 11
Quick Machine Recovery can search Windows Update for a fix when Windows 11 cannot boot. Here is how to enable and use it.