How to Connect to a Hidden Wi-Fi Network in Windows 7, Vista, and XP — Historical Guide
Historical steps for manually creating a wireless profile for a hidden SSID in Windows 7, Vista, and XP.

Historical support note: This guide covers unsupported versions of Windows. Hidden SSIDs are not a meaningful security control; use strong WPA2/WPA3 security on supported hardware instead.
To connect manually, you need the network’s exact configuration:
- SSID (network name)
- security type
- encryption type where applicable
- wireless password/security key
Do not guess these values. Obtain them from the network administrator or router configuration.
Windows 7 and Vista
- Open Control Panel > Network and Sharing Center.
- Select Set up a new connection or network.
- Choose Manually connect to a wireless network.
- Enter the SSID and the matching security settings.
- If the network does not broadcast its name, enable the option to connect even when the network is not broadcasting, if shown.
- Finish the wizard and test the connection.
Windows XP
The UI varies by service pack and wireless utility. On systems using Windows Wireless Zero Configuration, open the wireless connection properties and add the network manually under the wireless networks/profile list.
Avoid downgrading a router to WEP or another obsolete security standard just to connect an old PC.
Official reference
- Microsoft Windows lifecycle status: https://support.microsoft.com/en-us/windows/deployment/updates-lifecycle/what-does-it-mean-if-windows-isn-t-supported
Related posts
Browse all articles →Fix: No Wireless Networks Available in Windows 8, 7, Vista, or XP — Historical Guide
Historical Wi-Fi troubleshooting for Windows 8/7/Vista/XP when the wireless adapter is off, missing, disabled, or unable to see nearby networks.
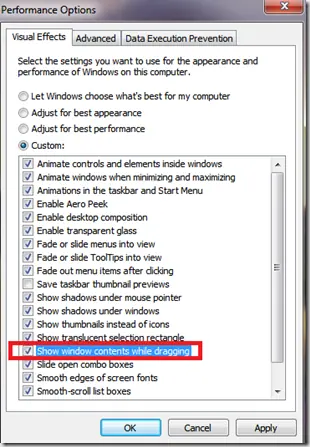
Fix Windows Turning Transparent While Dragging or Resizing (Windows XP–8, Historical)
Historical troubleshooting for Windows XP through Windows 8 when window contents disappear or appear transparent while dragging or resizing.
Fix PAGE_FAULT_IN_NONPAGED_AREA (0x50) in Windows 7/Vista/XP (Historical)
Historical troubleshooting for PAGE_FAULT_IN_NONPAGED_AREA (0x50), focusing on faulty drivers/services, antivirus software, NTFS corruption, and failing memory or hardware.