Guide to Dead and Stuck Pixels on an LCD Monitor
How to distinguish dead, stuck, and transient pixels, test a display safely, and decide when warranty or panel replacement is appropriate.

A single abnormal pixel can be distracting, but the right response depends on whether it is actually dead, stuck, or only appears wrong in one application.
Dead pixel vs. stuck pixel
- A dead pixel generally remains black because the pixel is not producing visible light.
- A stuck pixel/subpixel may stay red, green, blue, white, or another fixed color.
- Dust, image-retention effects, scaling artifacts, and software overlays can sometimes look like pixel defects.
1. Confirm the defect
Display full-screen solid colors—black, white, red, green, and blue—and check whether the same point remains abnormal. Also test another input or operating system if available.
Take care with browser-based flashing “pixel fixer” tools if you are sensitive to flashing light or have a photosensitive condition.
2. Power-cycle the display
Turn the display fully off, disconnect power briefly if the manufacturer permits it, then reconnect and retest. For a laptop, a normal restart is sufficient.
3. Check the warranty policy
Monitor and laptop manufacturers define their own pixel-defect thresholds. If the panel is new or covered by warranty, document the defect and contact the manufacturer before trying physical methods.
Avoid pressing, rubbing, or striking the panel
Older guides often suggested massaging or pressing a stuck pixel. That can damage the LCD layers or create additional defects, so it is not recommended here.
Software cannot repair a physically failed pixel. If a defect persists across inputs and test colors, the practical options are warranty service, panel replacement, or living with the pixel.
Related posts
Browse all articles →
How to Troubleshoot Thermal Shutdowns on a Laptop or Desktop PC
Practical, safety-focused steps for diagnosing overheating and thermal shutdowns, including airflow, fans, dust, firmware telemetry, and professional service.
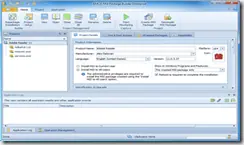
EMCO MSI Package Builder for Silent Application Deployment — Historical Review
A revised archive of a 2014 look at EMCO MSI Package Builder, with current product context and clearer explanation of MSI repackaging and unattended deployment.

Wondershare Video Converter Ultimate — 2013 Review and Giveaway Archive
A historical archive of a 2013 Wondershare Video Converter Ultimate review. The giveaway is over, and the product is now known as Wondershare UniConverter.